25Live is our campus event management system. Requests for use of University spaces, including outdoor locations, for events or meetings should be entered into 25Live unless managed by another system (e.g. Tech Suites located in the Library or Innovation Studio should be requested through LibCal). Requests are generally handled within two business days.
Classroom Disclaimer: Reservations for events in academic classrooms are subject to change if reserved space is needed for academic scheduling. If your event is displaced for this reason, we will make every effort to find a new space.
25Live Tutorials and Guides
25Live Overview - Request Process and Timeline
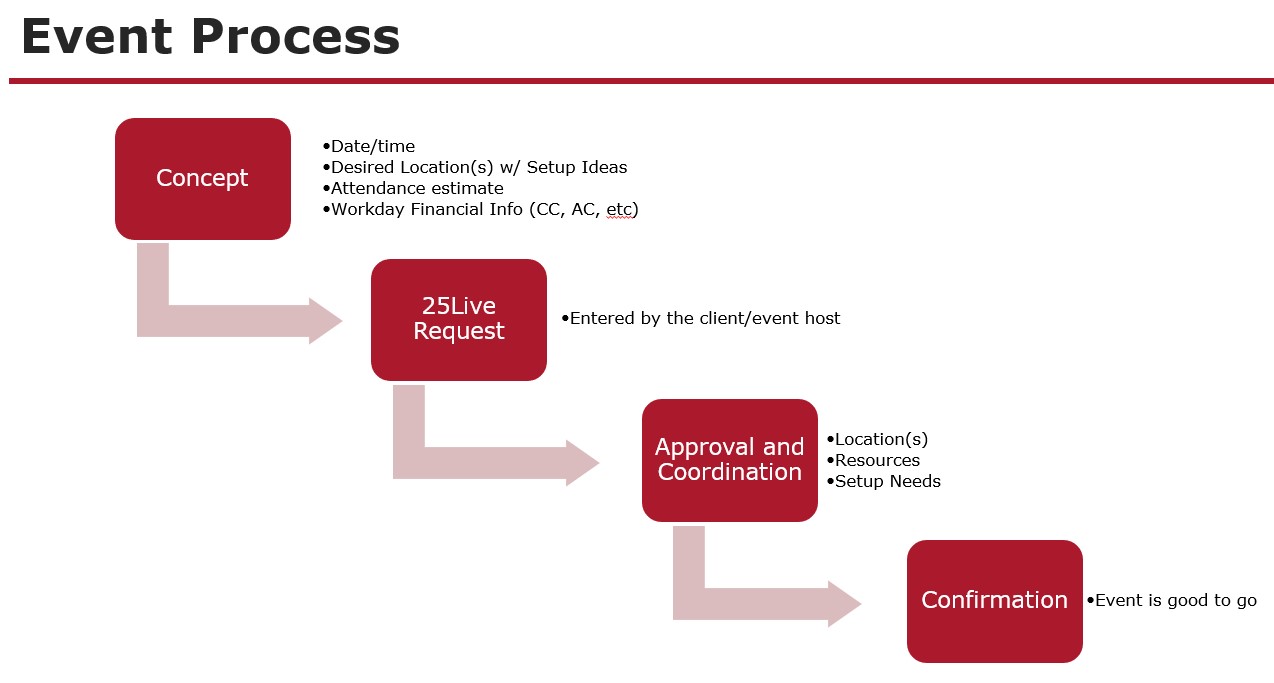
Concept – This is the information gathering phase that will determine how you fill out the event request form.
Request – Requests should be entered as soon as you are able. Larger events should be requested at least a month in advance. Smaller events with no setup needs should be requested at least a day in advance by faculty and staff (or accompanied by a phone call if it’s sooner than that) or at least three (3) days in advance for students.
Once you’ve put in a request, it will go through all the appropriate approval queues and coordination before being confirmed.
Approvals – This is the part of the process that allows our Event Coordinators and Service Providers to determine if they can successfully support your event as envisioned. Likely you will receive an email confirming your location while other details about your event are still being evaluated or coordinated. The event will remain listed as Tentative in 25Live during that time.
Confirmation – This is when your event will be changed to a Confirmed state within the system and your event will be considered good to go and ready to be executed.
Accessing 25Live
https://25live.collegenet.com/pro/wpi
First thing first, log in!
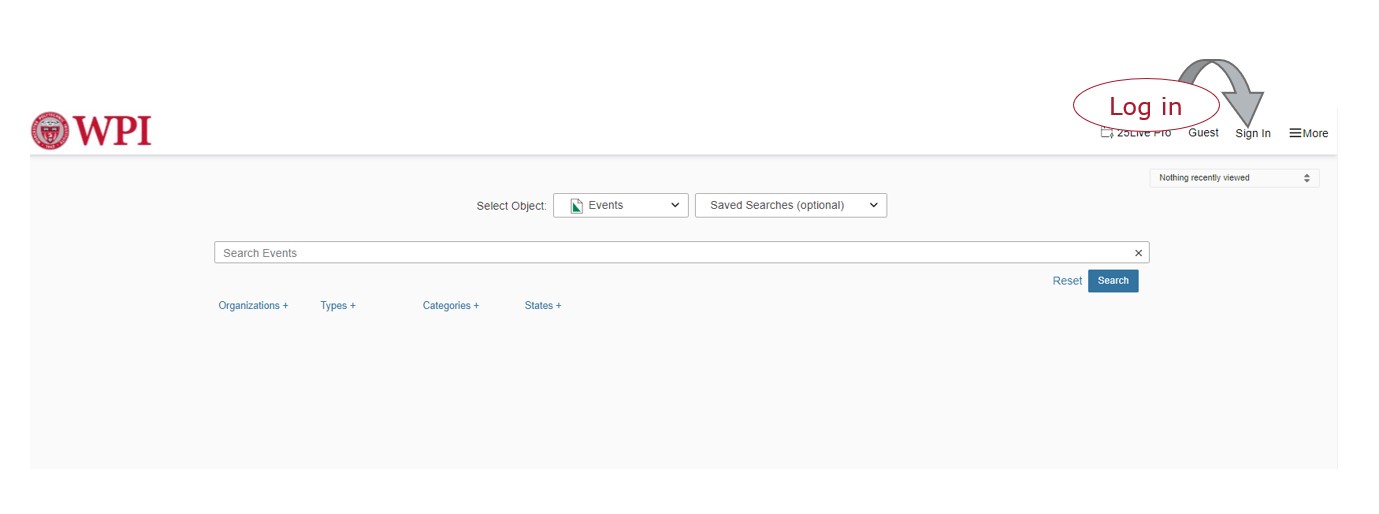
Limited information is available to view without logging in, but you will not be able to request anything or see most locations without logging in.
Everyone with a WPI email address can log into the system using Single Sign On. An account will automatically be created for you the first time you log in, and your new account will be placed in a default security group with limited access.
Staff and faculty, please note, you should email events@wpi.edu after you log in the first time to be moved to the appropriate security group. Employee access cannot be granted without logging in first.
Dashboard/Home Page
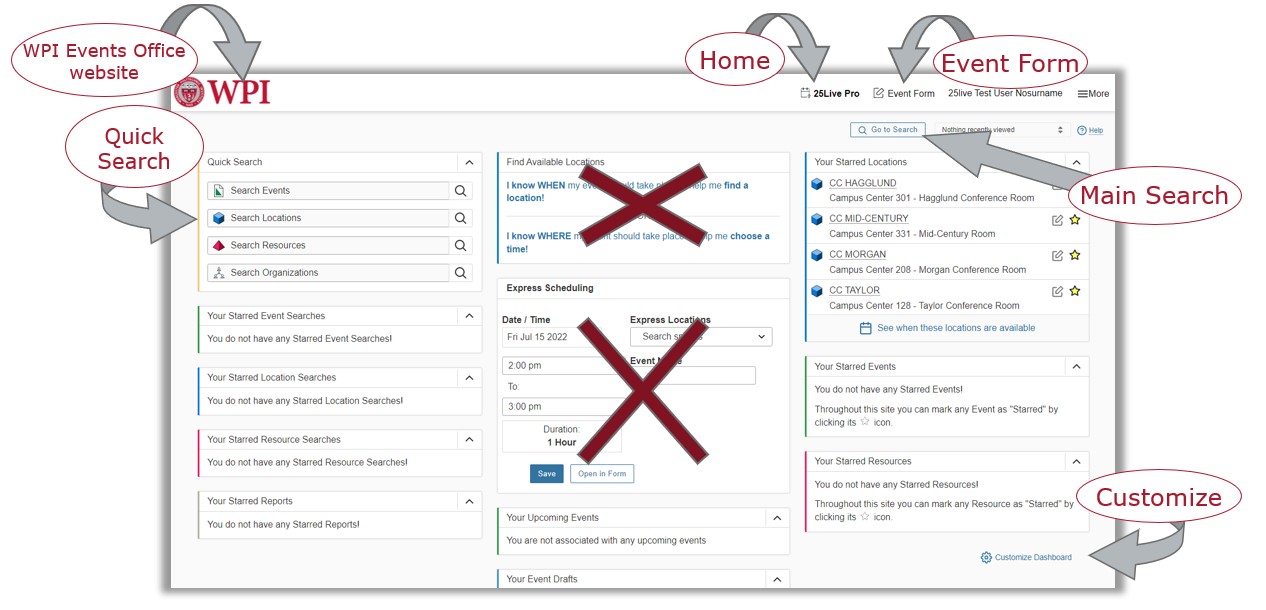
WPI logo up in the top left – takes you to our Conference & Event Services Office webpage’s 25Live info (this page)
25Live Pro button up at the top – home button to return to this dashboard view
Event form button – begin an event request
Go to search – begin a search for events, locations, or organizations
Quick search box – search for specific events, locations, or organizations without going to an additional page
Customize dashboard – change where items are located on the dashboard view or hide items you don’t use
Express scheduling –
The express scheduling widget on the main dashboard is only used for a few locations on campus – specifically locations that never need support and don’t need to go through any approval queues. These are mostly hoteling offices for staff and lab spaces for students outside of class times. So if you’re not positive that the location you want can be booked this way, please avoid this widget.
Finding a Location - Creating a Search
In any search box, you can use abbreviations, full words, or even partial words. For instance, “SL”, “Salisbury”, or “Sal lab” will all return locations in Salisbury Labs.
Quick search –
Quick searches on the dashboard view are good for when you know exactly what you’re looking for. You have a specific location or building that you’re interested in.
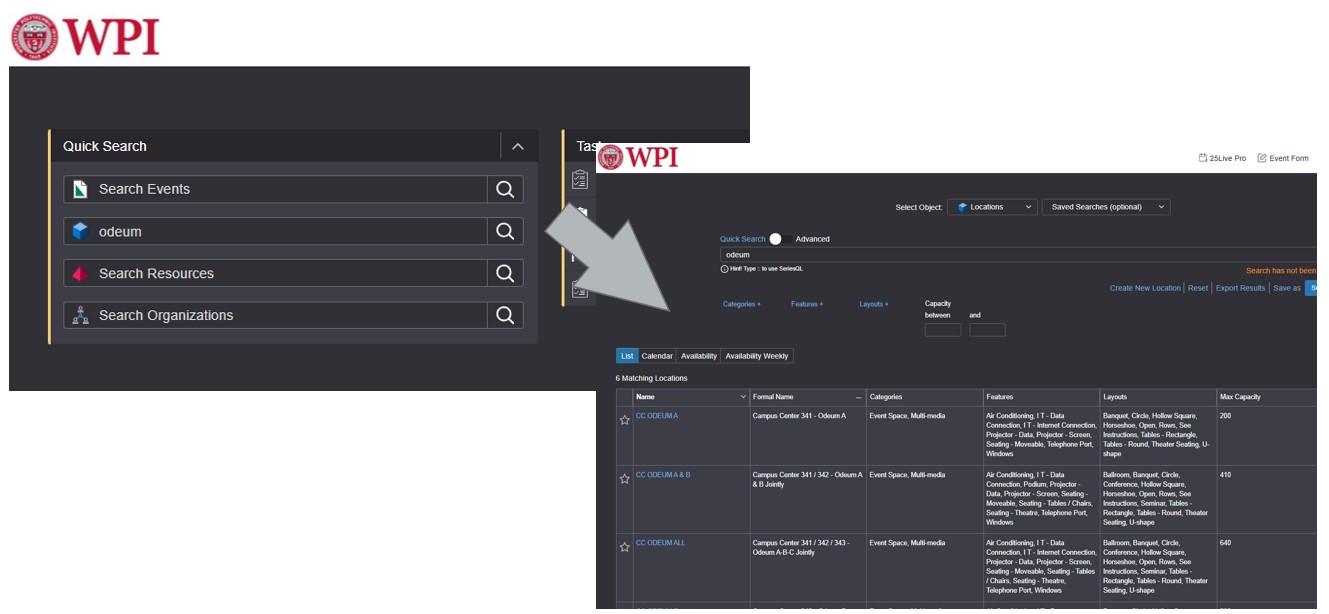
Search by category/headcount/feature –
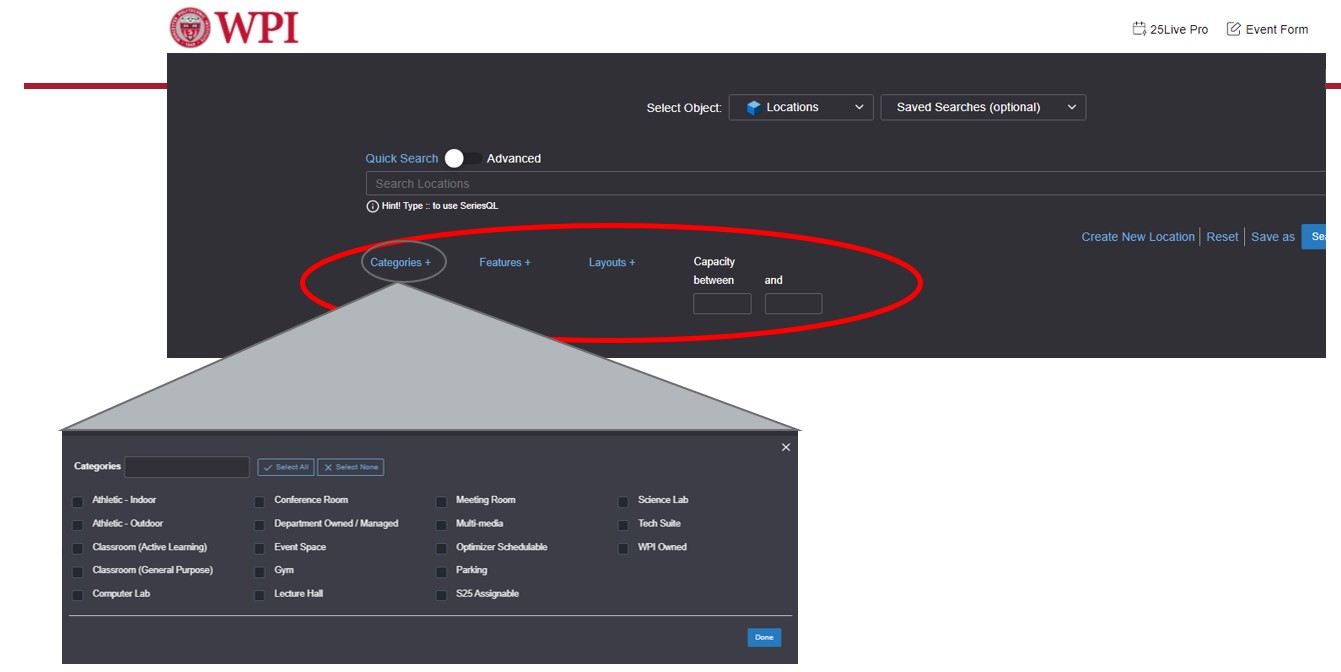
Within the main searches, you can search by category, feature, or headcount of locations without needing any additional criteria. So if you have a meeting that you would like to hold in a conference room, but don’t have a preference on what building, you can just choose to look at all conference rooms.
These filters can be used together as well. For instance, you can choose the category “conference room” and list a minimum headcount of 15 if you know you will have at least that many people attending the meeting.
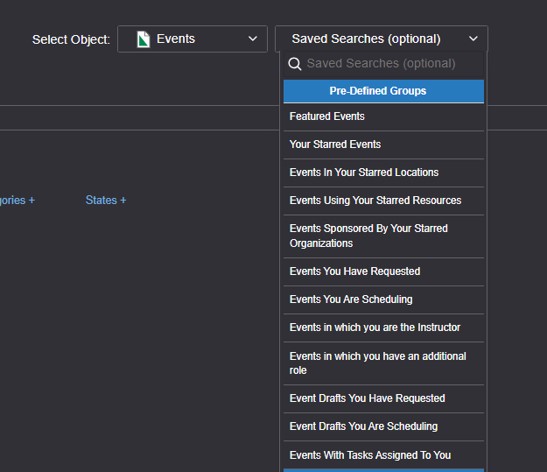
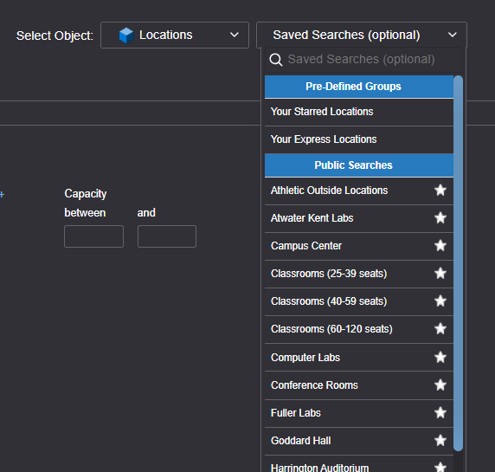
Pre-defined searches –
There are some searches that have already been developed for the convenience of our requesters. These can be found in the right-hand drop-down menu of the main searches.
|
|
|
Starred locations –
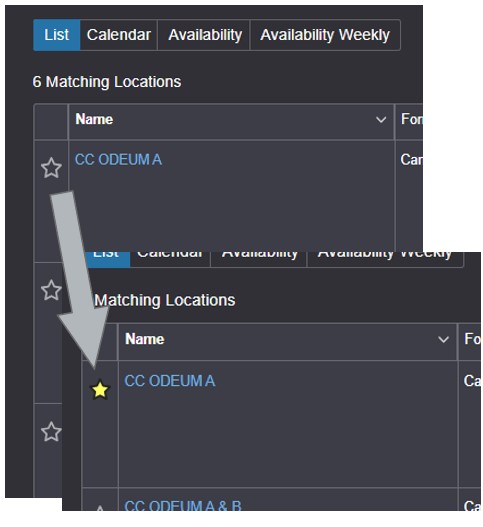
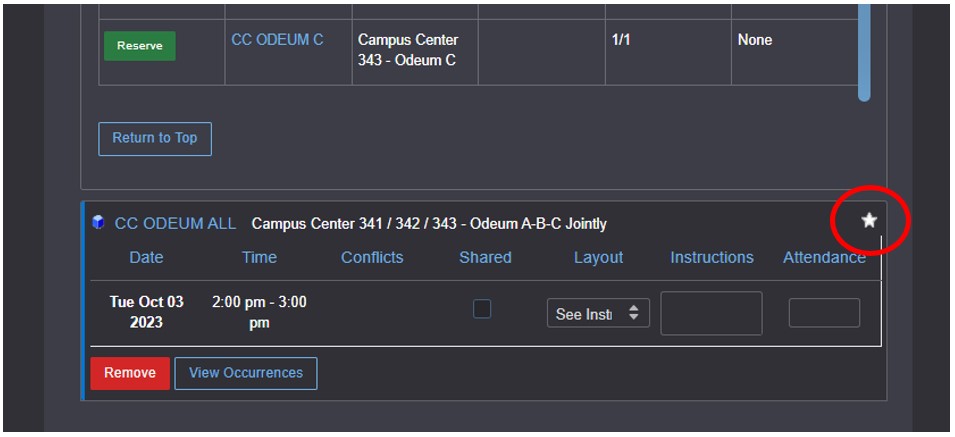
You can build your own search based on locations you use frequently. After you search for a location or select it in the event form, you can click the hollow star next to it, turning it yellow. The next time you log in, it will be added to Your Starred Locations.
This list of starred locations can be automatically populated within the event form if you choose.
|
|
|
|
Navigating Location Search Results
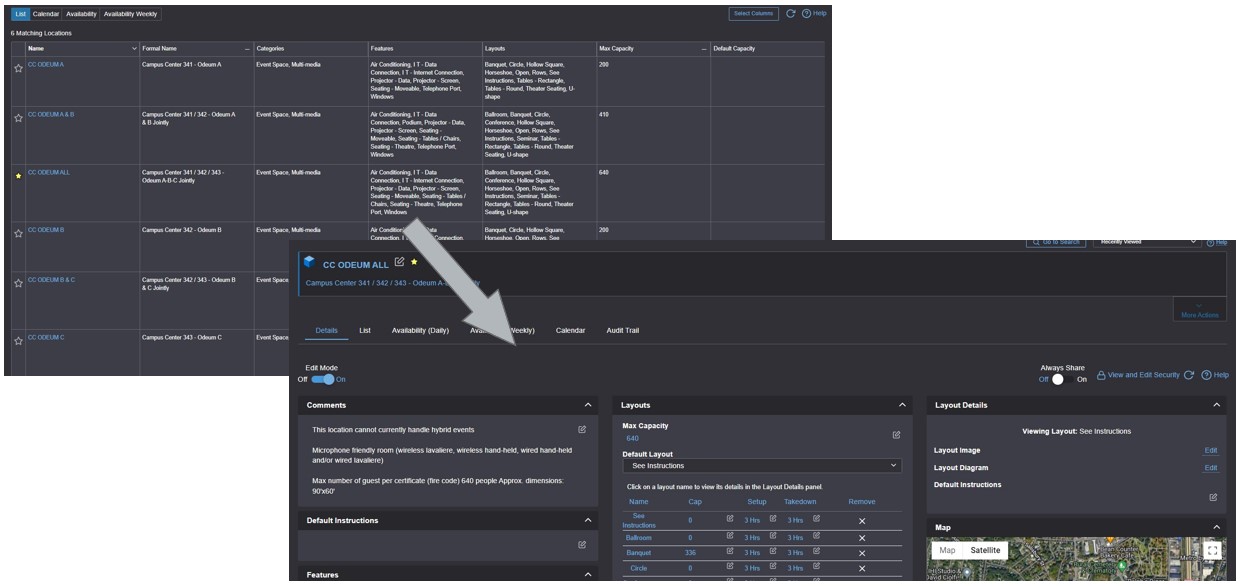
List view – Your first search each session will always bring you to the list view. There are a lot of details on this page, but you’ll get the most detail if you click on the item.
This detailed view shows all the information related to the location with the full feature list, layouts and capacities, and any diagrams we have loaded into the system.
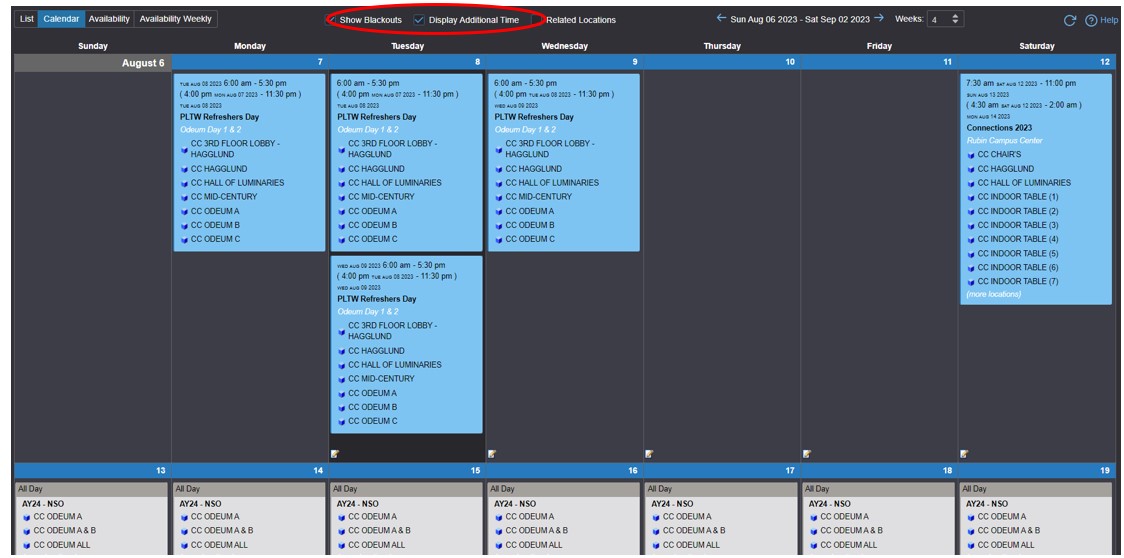
Calendar view – This will show you a calendar of all events scheduled in the locations your search returned. The default view is one week, but you can adjust both the start date of the range and the number of weeks that show at one time.
We do recommend keeping those two boxes circled here checked off because otherwise you may run into unexpected conflicts when you go to enter an event. Blackouts, as mentioned before, restrict requesters from entering in new events. Displaying the additional time will show set up and breakdown times on existing events instead of only showing the time that the event is being held.
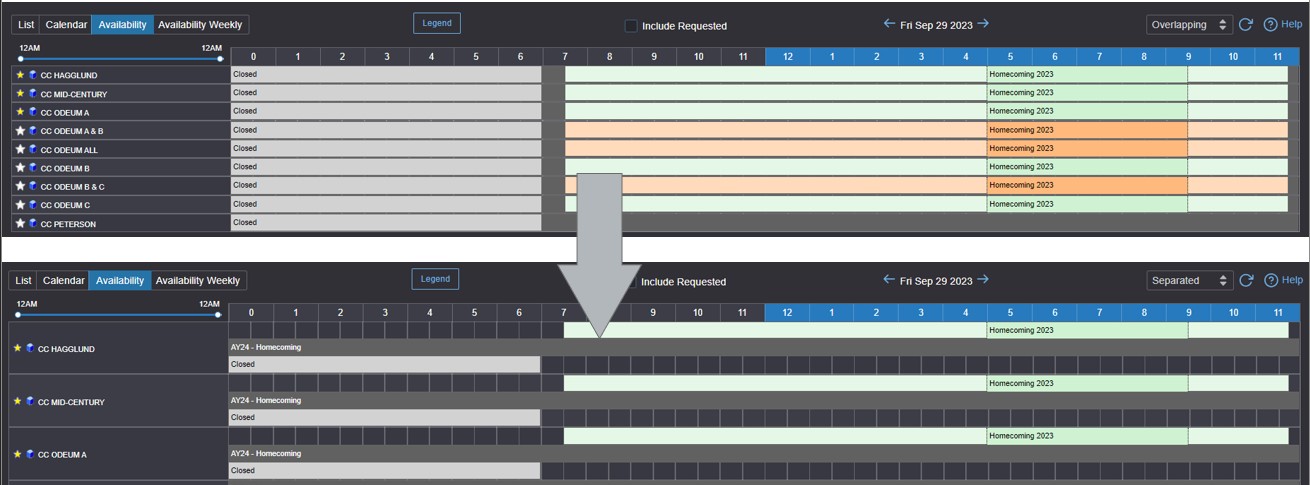
Availability view – This displays the most information at a quick glance. This is a single day view, but it will always include when the location is closed, blackout dates, and the additional setup/breakdown times on events. This view is especially helpful for comparing which locations are available at a specific time.
There is another box on this view that we recommend keeping checked off – the “include requested” button will show requests that are still waiting to be approved in a particular location. You can see one such example toward the bottom. If we get more than one request for a space at the same time, priority will be given to the request that came in first.
Many locations are marked as closed until a certain point in the day – this may block the title of a blackout from showing. If that happens, you can click on the dropdown to the right and select the separated view to expand and see the full information.
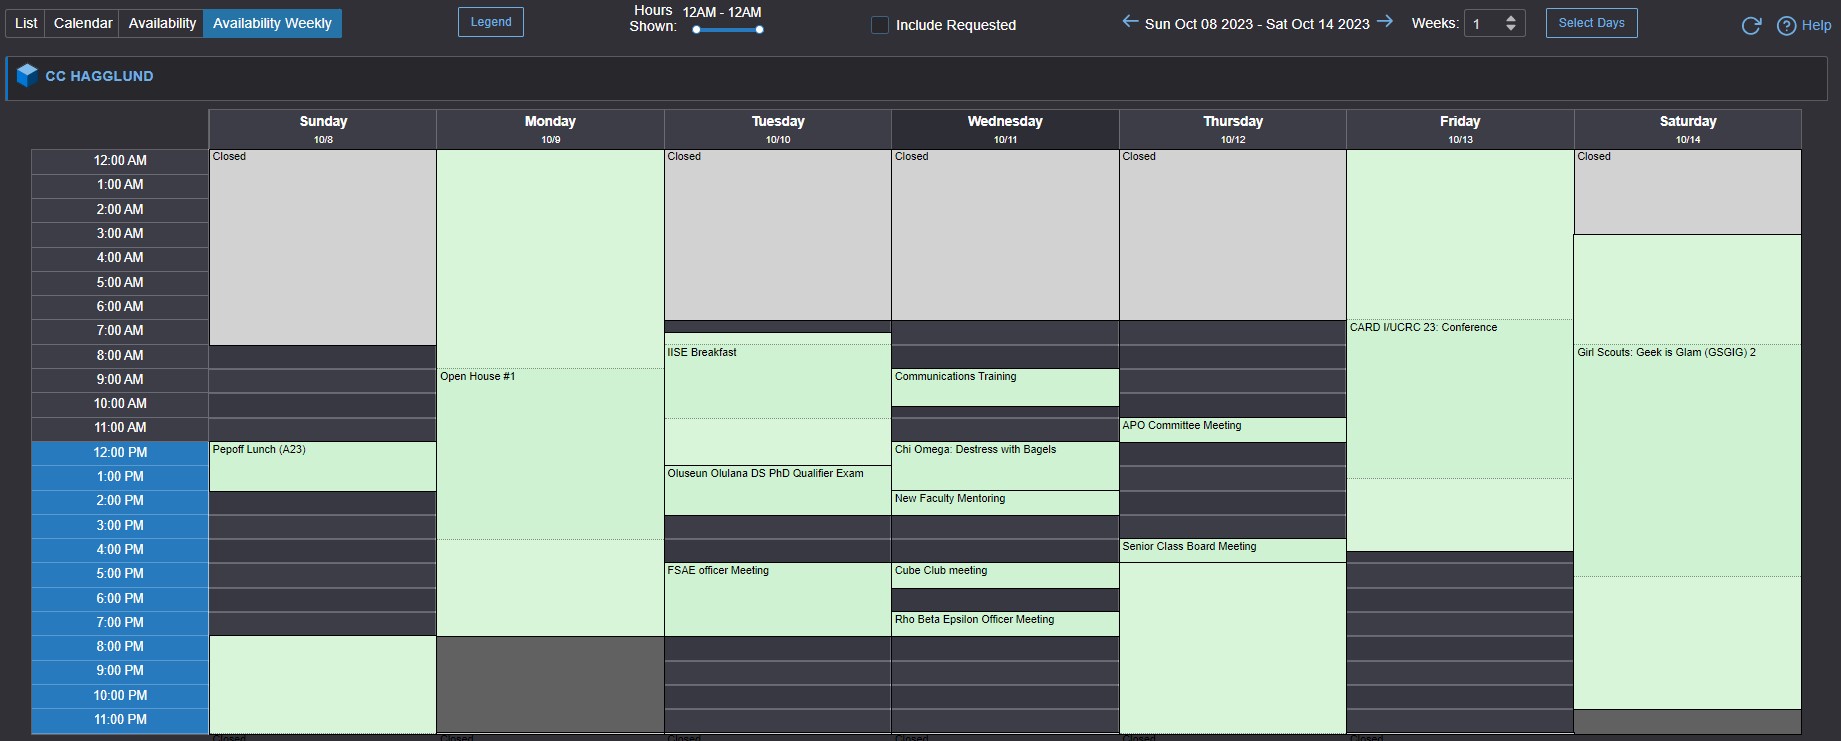
Availability weekly view – This shows similar information to the regular availability view just in a different format. If your search includes more than one location, you’ll need to scroll down to see each individual space. This view is useful for checking what is happening in a particular space over the course of a week or comparing usage over several weeks.
Event Form
The Event Form can be found at the top right of the screen. Fill out all the required fields (marked with the word Required near the field title or with a red *) and hit “Save” at the bottom. You should see a new page after you hit save. If nothing happens, it means that there is a missing required field or an error code above that needs to be addressed before you can submit.

Event form fields:
Event Name – This should be something unique to the event that will help both you and the event coordinators identify it later.
Event Date and Time – This should be the advertised date and time of the event. The time you'd like to get into the room or leave the room should be entered in the Pre-Event/Post-Event Time fields in Additional Time (above the calendar).
How many people are you expecting to attend? – This should be a number greater than 0. Any estimate is better than nothing because it helps ensure that your requested space will be big enough for all your attendees.
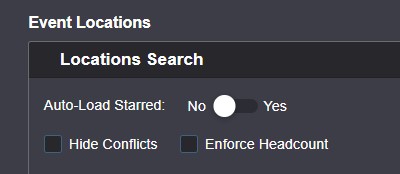
Location(s) – This search works like the rest of the searches in 25Live. Please pay attention to whether you have the Hide Conflicts and Enforce Headcount checkboxes checked or not as that can cause expected search results not to show.
What type of event are you having? – This will help your event coordinator assess the appropriateness of the requested location and coordinate the correct service providers and resources to make your event as successful as possible.
Sponsoring Organization – This should be the student group(s), office(s), or department(s) who are hosting the event and are responsible for any incurred expenses.
Please include a sentence or two describing your event. – This is another tool for the event coordinators to ensure that the correct service providers and resources are ordered to make your event as successful as possible.
Questions related to your event – These questions will change based on your event type and requested location(s). Please fill them out as thoroughly as possible.
Additional documents – These could be any related information that would be beneficial for your event coordinator to be aware of including diagrams of previous versions of the event for reference. These should not be images used for advertising.
Affirmation – This is the large block of text at the end that has some important information you will agree to in order to hold your event.
Blackouts
Blackouts are a tool we use in the Conference & Event Services Office to prevent event requests on days when the university’s labor and resources cannot handle any additional strain. The two most common reasons are holidays when the school is closed and days that major university events have already been scheduled. We will also add blackouts throughout the year to days where our service providers and resources cannot support any additional events.
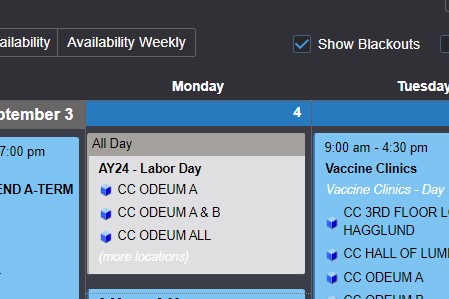
Identifying Blackouts:
From the calendar view, it will show in a gray box at the top of the day:
From the availability view, there will be a black bar with the title of the blackout (you may need to switch to the Separated view to see the title):

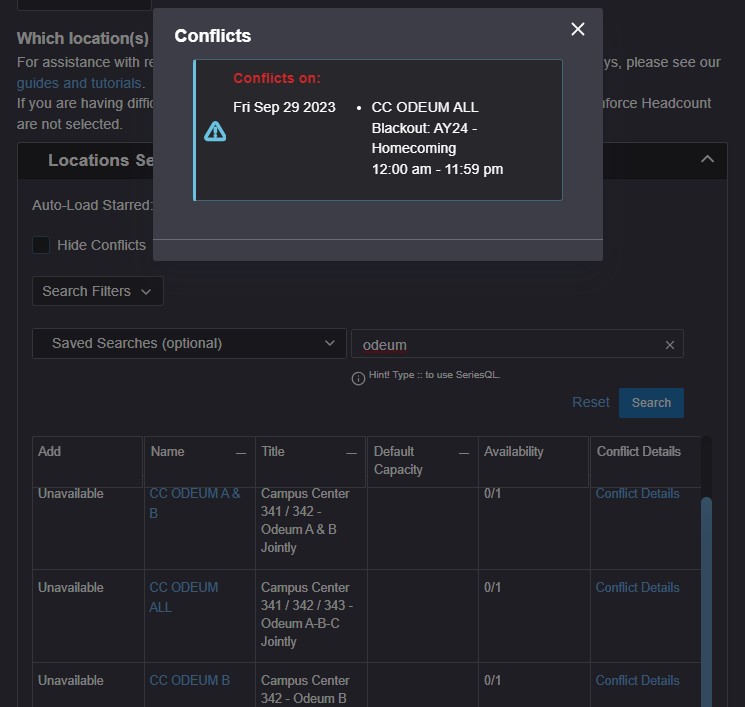
From the event form, you can click Conflict Details, and the blackout information will be listed:
Meetings and small events requiring no resources or service provider support can be requested using the event type Blackout and the location Blackout. An additional question will then populate below where you can put in your Requested Location. All Blackout requests are subject to approval, and if approved will be for the space only. No resources can be requested.
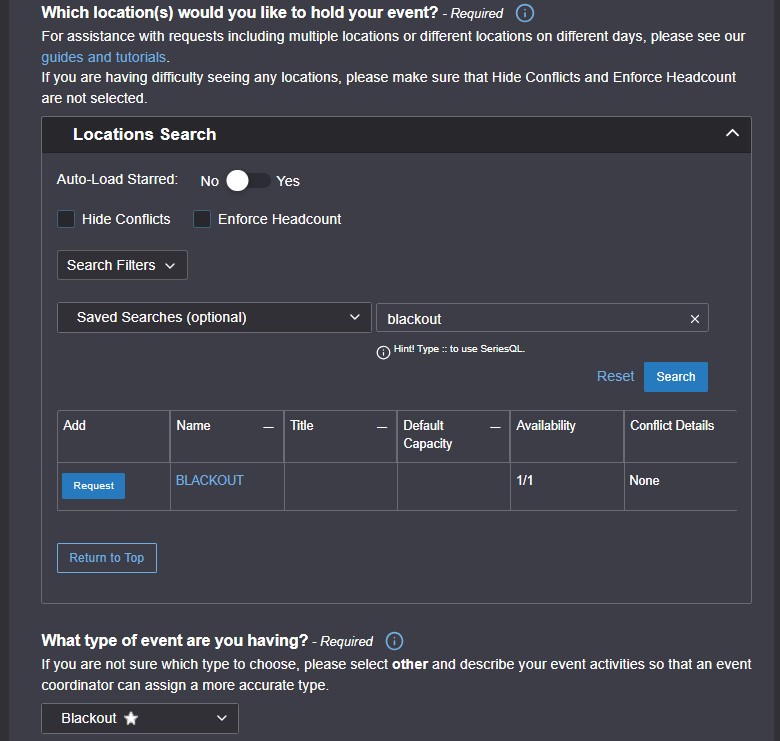
You can also include Blackout requests in multi-occurrence requests by including the Blackout location on those dates and selecting a Requested location in the question below. There is no need to use the Blackout event type in that case.
Request Submission - What Happens Next?
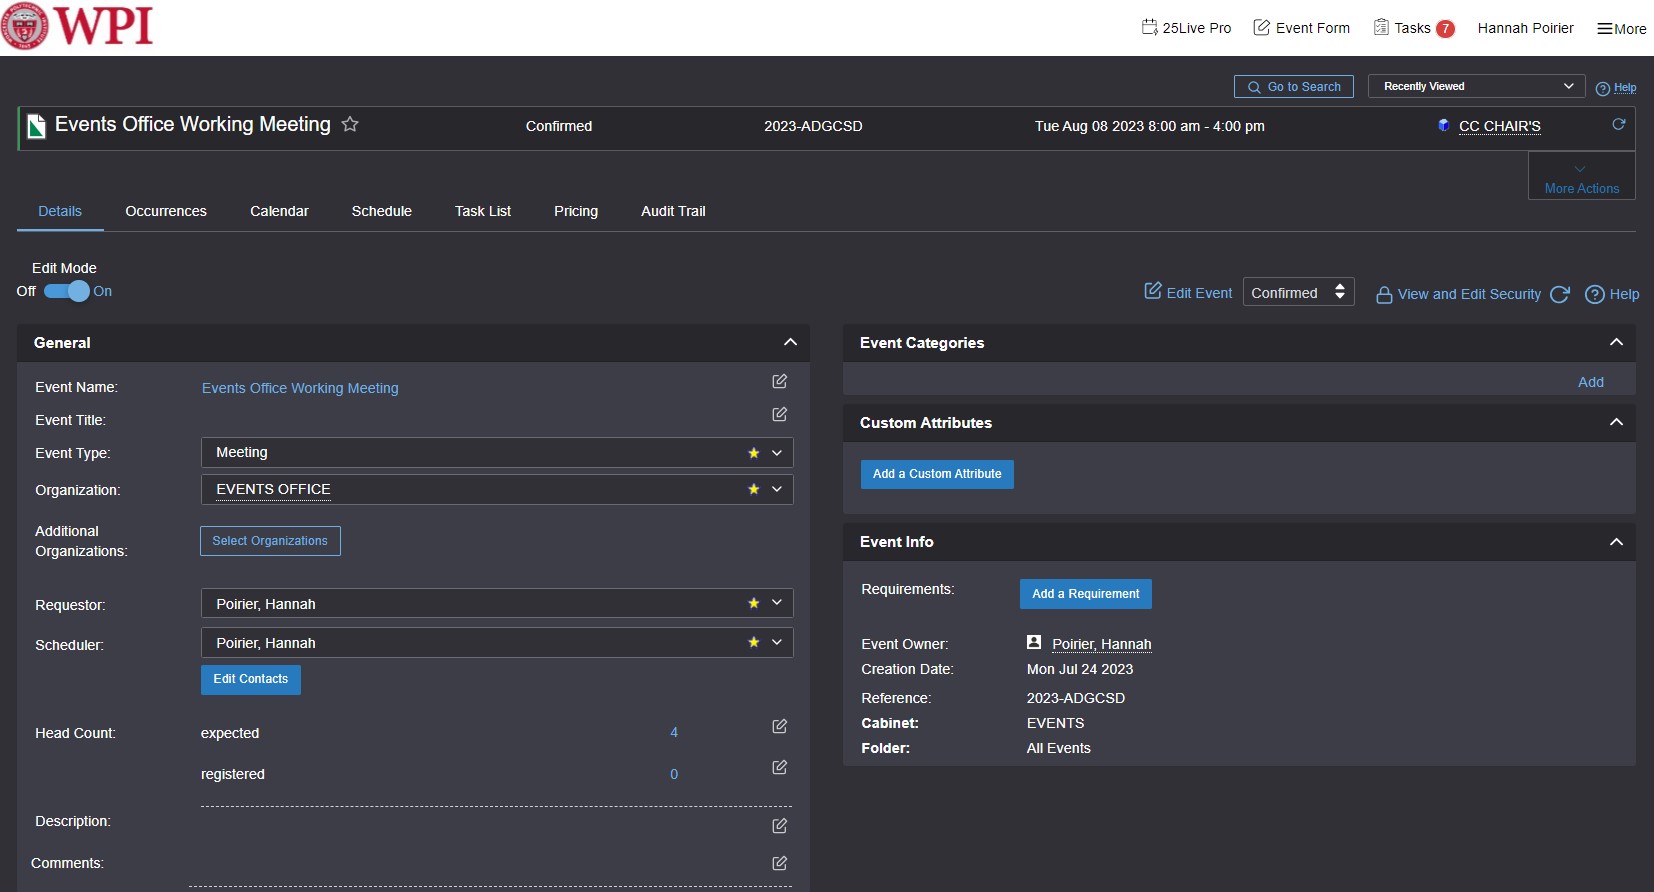
If you see the event details page, that means your request has been successfully submitted. You can access this page for your event at any time as long as you have your event reference number (found between the event state and the date in the top middle).
Occurrences – This tab will show all occurrences with assigned locations and resources for your event.
Calendar – This view is useful for multi-occurrence events. Single occurrence events will only show that one thing.
Schedule - This shows how much available time there is on either side of your event in your assigned location.
Requesters will also get an email receipt for new submissions. Please keep in mind that email is not a confirmation of your event, only that your request has been saved successfully and received in our approval queues.
You will receive another email from an Event Coordinator or another member of the Events team when your location has been approved/denied or the status of your event has changed. It is important that you double check those emails and the confirmation report in case details have changed. This will also be how Event Coordinators contact you with questions regarding the planning and setup of your event.
Please keep in mind, your request will remain listed as tentative until all details have been approved and coordinated. Your location can be approved while the event remains listed as tentative.
Express Scheduling
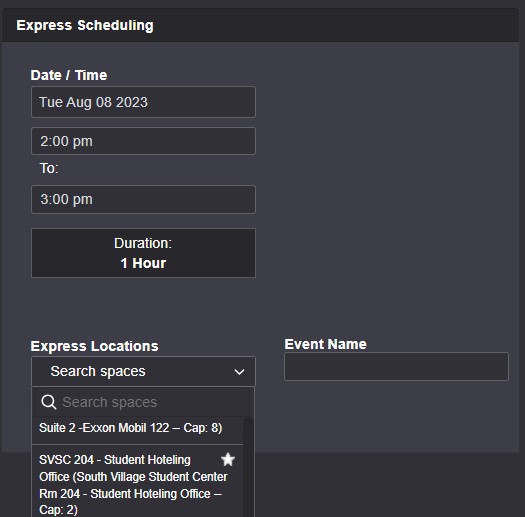
There are several locations around campus that can be reserved as is and requesters can receive instantaneous confirmation. These can be requested through the Express Scheduling widget on the dashboard.
Express Scheduling does not mean a faster, more convenient Event Form. Most locations cannot be requested through this form and will not populate in the search.
Finding Events You (or Someone in Your Department/Group) Have Requested
If you ever need to look up an event that you have requested, you can do that either by clicking on the number of events in which you are the requester which is found on the dashboard view, or you can use the pre-defined event search labeled “Events you have requested”.
|
|
|
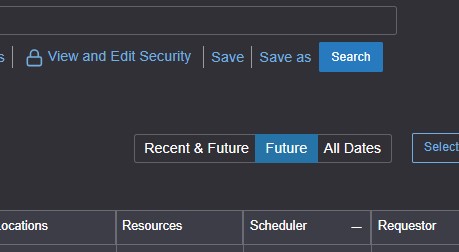
It will default to showing Future Only, but if you change it to All Dates (to the right below the search bar and above the table) it will show past events as well. There is also a new button labeled Recent & Future, which will show anything from the past 18 months along with anything upcoming.
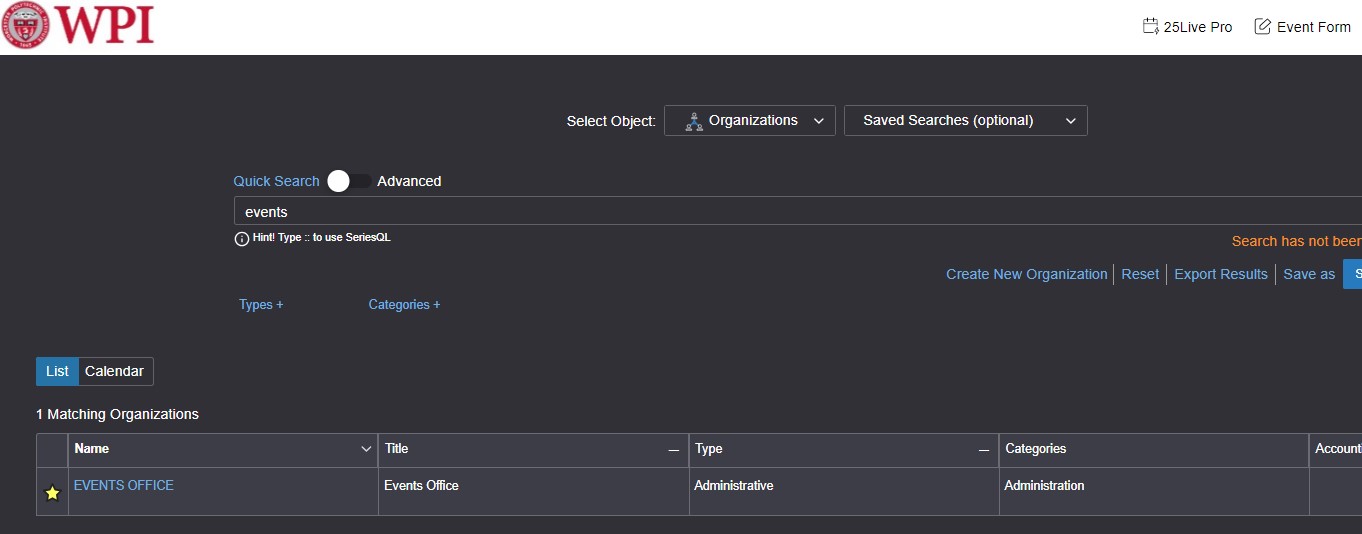
You can also look up events that someone else in your department or student group has entered. You can use the Organizations search and the calendar view that shows up. You can also click into the details of the organization and choose the list view to show the events that way.
Editing an Event
Most requesters have very little access to fields in the edit form. Requests to change or update your event, especially the date/time or location, should be communicated as soon as possible to your Event Coordinator – you can reply directly to the confirmation email if you’ve received one – or email events@wpi.edu.
Recurring or Multi-Occurrence Events
If you are putting in a request for a recurring meeting or an event happening more than once, please try to put these all in one request. You can do this in the event form when you see the calendar by either clicking directly on the calendar to add occurrences or by clicking the “repeating pattern” button and choosing one of the preset patterns.
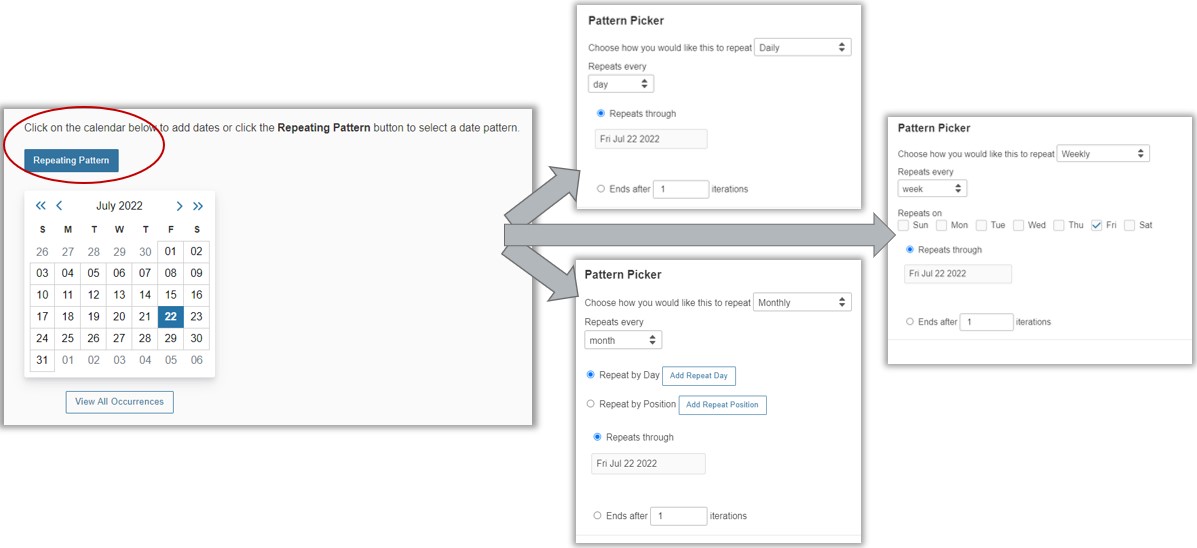
Alternatively, an ad hoc series (one that doesn't follow a predictable pattern) can be selected by simply clicking on the calendar to add dates.
You can even add multiple occurrences in one day by clicking on the same day on the calendar and selecting add occurrence.

Many times a location will not be available for all occurrences of an event. If that is the case, you can request multiple locations and choose which locations to include with which dates by clicking on View Occurrences.

How Far in Advance Can You Schedule?
In order to better facilitate planning of the academic schedule and large University-wide events, we can only accommodate requests for several months at a time. Requesting periods will be opened in waves and broken up into three chunks according to the following schedule:
A+B Terms (up to Winter Break) - On/near August 1
C+D Terms (January through May) - On/near November 1
Summer (June through mid-August - near C/D term break
This will help ensure that classes are placed appropriately and account for most changes in the academic schedule. It also helps our office spread out our coordination efforts to ensure we can offer the best support at the right times.
The schedule above applies only to events spaces and conference rooms. Requests for the following academic year will not be considered until August 1st despite event space requests opening sooner. Student group requests for Athletic spaces will not be considered until after the first week of each term.
