Many people sheltering at home during the pandemic are feeding their families and soothing frayed nerves by baking. Actually, they’re baking so much bread that grocery stores across the country keep running out of yeast.
But that’s no reason for you to put the flour and mixing bowls away. You can simply make your own yeast. That’s what our grandparents did before commercially produced yeast started to become available in the late 1930s. No, you don’t have to be a chemical engineer to make your own bread starter. But it does help to have one explain how and why you can make bread even if the baking aisle is empty of this basic staple.
“It’s actually pretty simple,” says Eric Young, assistant professor of chemical engineering at WPI. “Baker’s yeast is just a fungus that loves eating sugar—like most of us. It’s really cool that you can capture wild yeast and make bread out of it.”
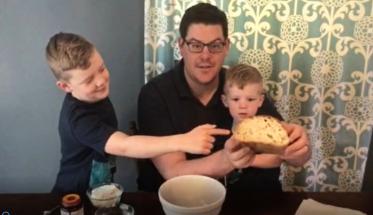
Young, who regularly bakes pies and bread with his children, says you don’t need to be a professional baker, or even an old hand at baking, to create your own yeast. The good news here is that there really isn’t a shortage of yeast. You may not find packets of dry yeast on store shelves these days, but natural yeast is everywhere, explains Young, whose research focuses on bacteria, yeast, and fungi. Natural, wild yeast can be found in flowers, trees, fruits, and vegetables—and yeast strains even live in the grains you’re baking with and throughout the air in your home.
To make your own natural yeast, all you need is flour and water, along with time and attention.
Yeasts and bacteria in your kitchen and on the grains seek out the sugar naturally present in the flour, and the amalgamation begins. By fermenting water and flour, you’re growing colonies of both wild yeast and "good bacteria," or lactobacilli. It’s a bubbly chemical utopia where wild yeast and bacteria live harmoniously.
Here’s how:
- Combine equal parts water and flour by weight. By volume that’s about 2 tablespoons water and 3 tablespoons flour.
- Use distilled, bottled, or highly filtered water (because the chlorine typically present in tap water is not a friend to yeast).
- Use whole wheat flour because it has more micronutrients (zinc, iron), which promote the growth of yeast and bacteria—though Young says any store-bought flour will work.
- Create the mixture in a glass jar no smaller than one quart so the growing yeast has room to expand. Use a loose lid, or clean dish towel or cheese cloth to cover the jar. It should not be airtight because oxygen needs to get in and CO2 needs to get out.
- Stir the water and flour together, cover the jar loosely and set it aside at room temperature. Give it a quick stir two or three times over the next 24 hours to incorporate some oxygen.
- Repeat this process every 24 hours —feeding the mixture 2 tablespoons of water and 3 tablespoons of flour each time—until you start to see bubbling and you notice a pleasant yeasty smell. That should take three to five days. Continue to stir the mixture two or three times a day.
- If you bake once a week, you can keep your starter in the fridge and feed it weekly. If you bake a lot, you can leave the yeast on the counter and feed it daily.
- Yes, you need to feed your natural yeast to keep it alive and active. Use about half the mixture in your weekly baking and replenish that same amount with equal parts (by weight) of flour and water.
“When it’s ready, you’ll see fizzy bubbles start rising to the top,” says Young. “When you remove the cloth, it should smell like bready, floury goodness.”
However, Young also says to beware if the mixture does not smell good. "If your starter has gone bad, it will smell terrible and you may even see some colorful mold," he says. "If this happens, there’s no saving it. Throw it out and start again.
